Wait Event Action
Wait is a unique type of workflow action designed to pause the contact at a specific step in the workflow until a desired condition is met. This useful tool is handy when waiting for a certain time, contact reply, or event that needs to be completed before moving the contact forward in the workflow.
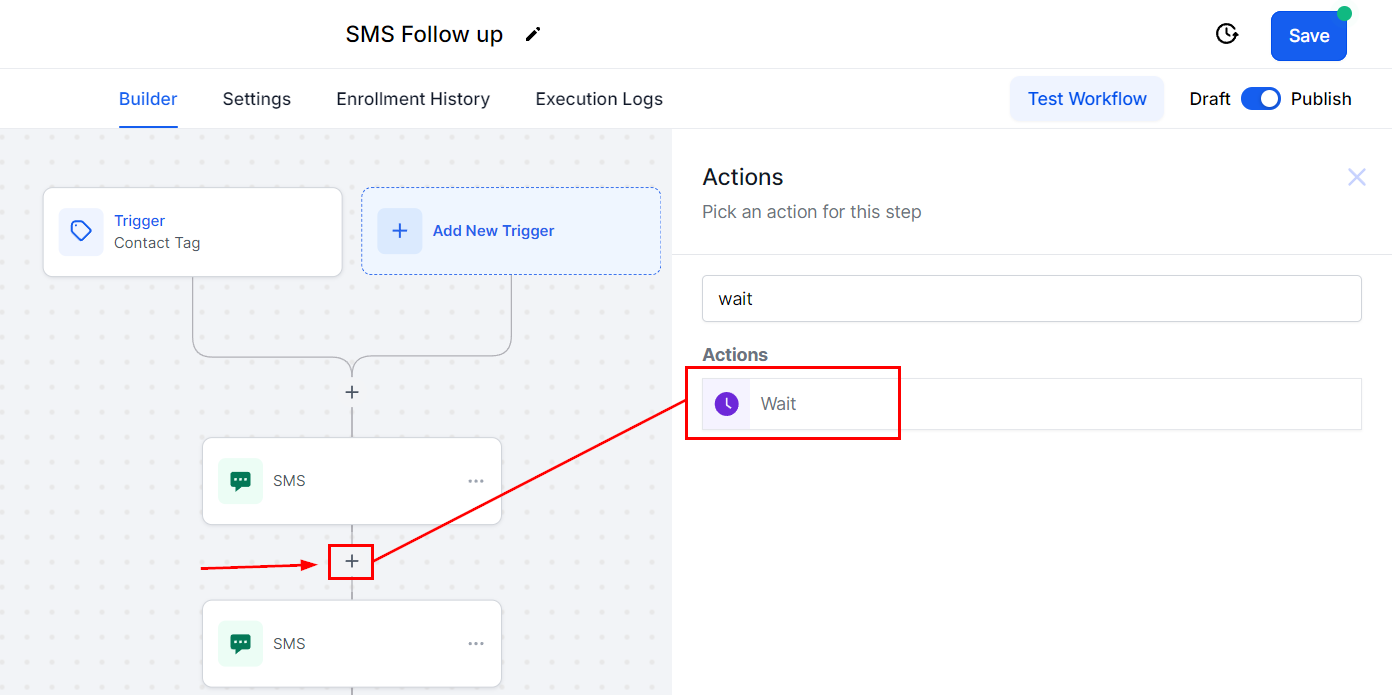
To insert this action between workflow steps, click the plus sign between the steps and select "Wait" from the options.
📌NOTE: The Wait Step can be set up using two distinct types of events—let's take a closer look!t!
Time-based
These will be for things that need to happen in a specific time frame, the available options for time-based events are:
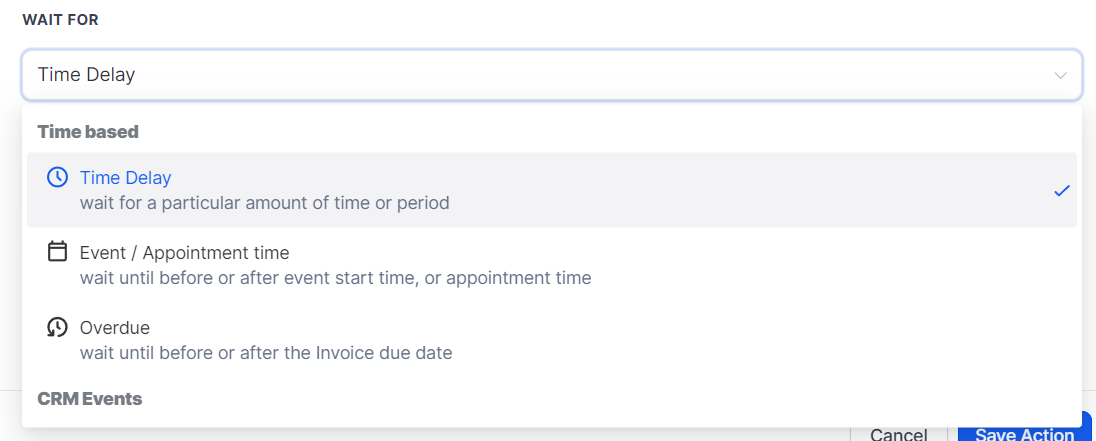
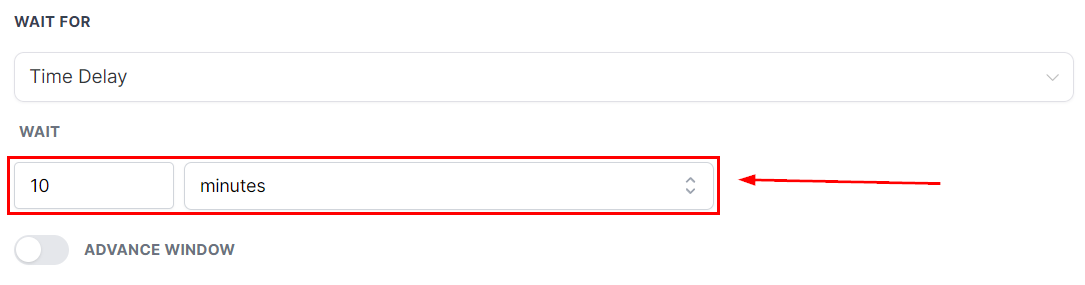
Time Delay
This allows you to set a determinate amount of time before the contact moves to the next step. To set it up, add the amount of time the workflow should wait before moving the contact forward.
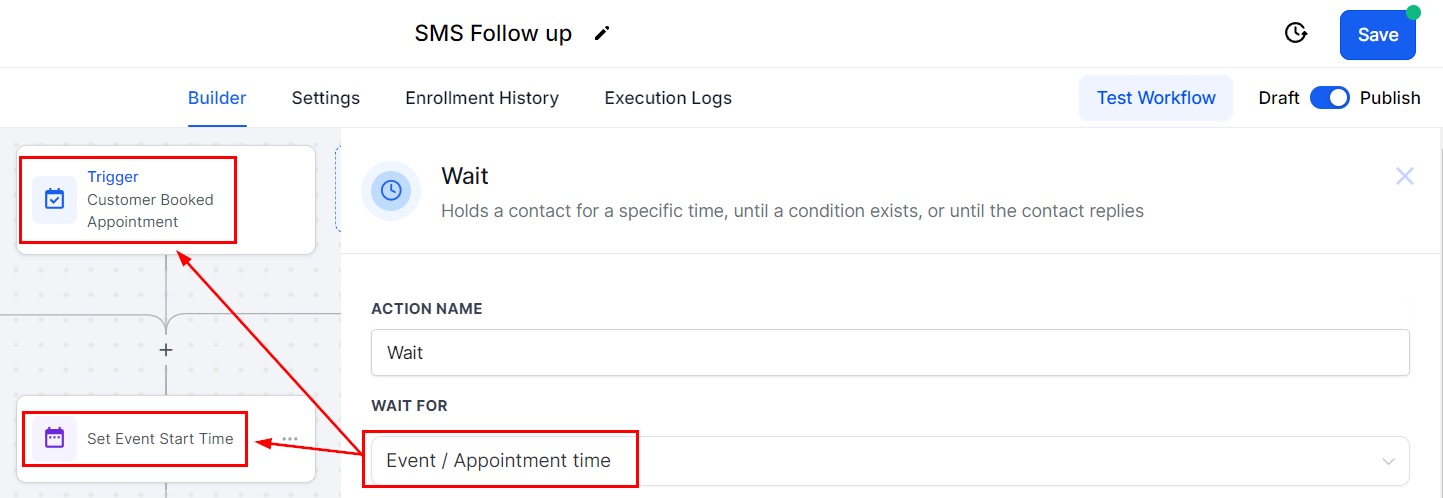
Event/Appointment Time
This allows you to make the workflow send the messages in a determinate amount of time concerning an event or appointment, for example, one day before an appointment. When setting a Wait step for an event add the action Set Event Start Date first. Set the time you want the contact to move forward in the workflow.
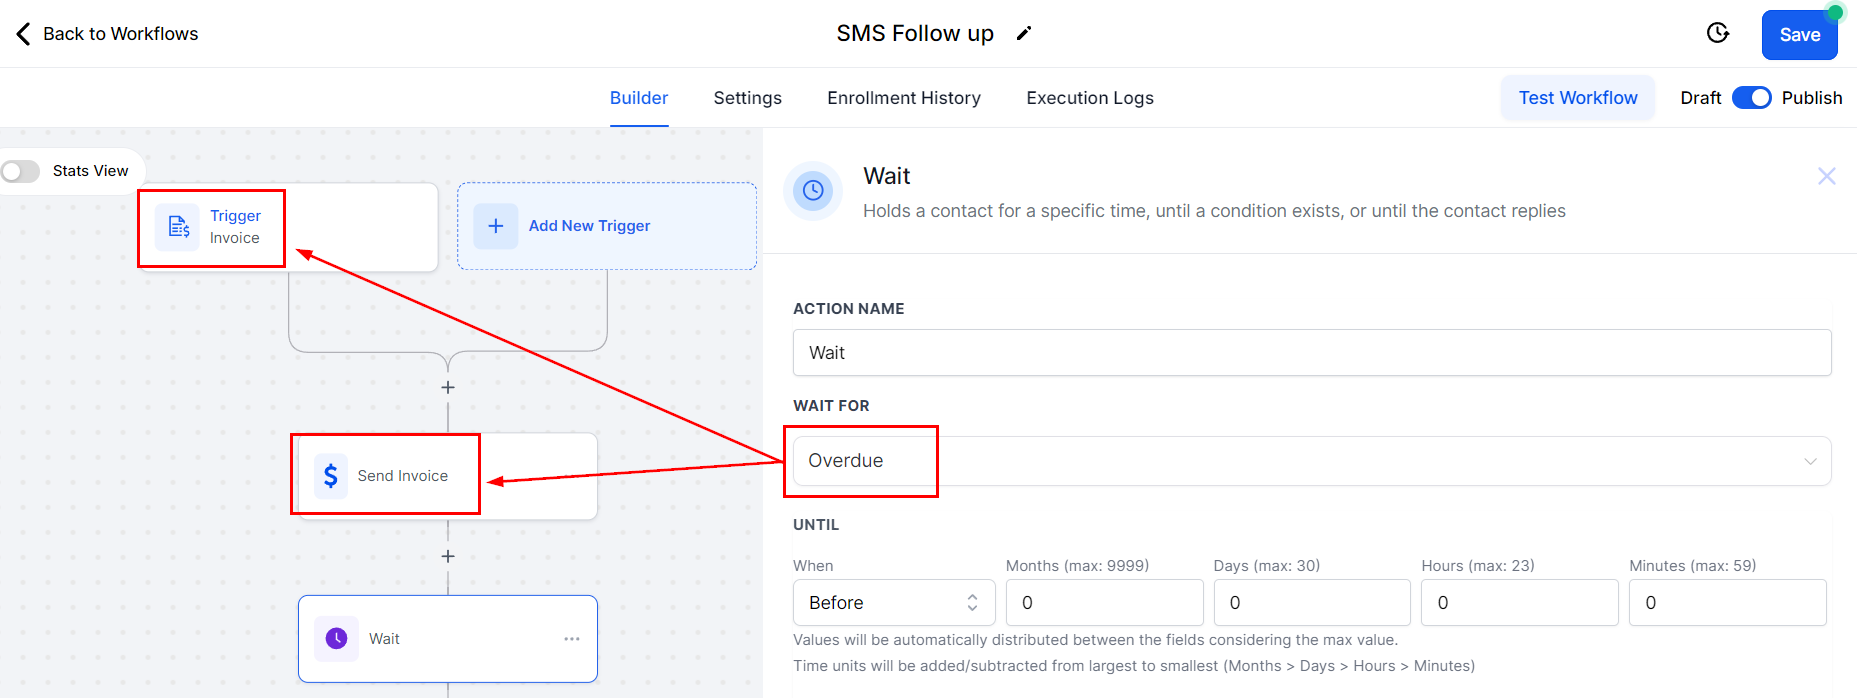
Overdue
This feature enables you to schedule messages to be sent a specific amount of time after an invoice’s payment date. When configuring this Wait step, ensure that you have included a trigger or action that guarantees the contacts receive the invoice; otherwise, they may get stuck at this step.
Setting an Event/Appointment Time or Overdue Wait Step
Select when you want the next step to happen. Here you can choose between before, after, or an exact time concerning the event.
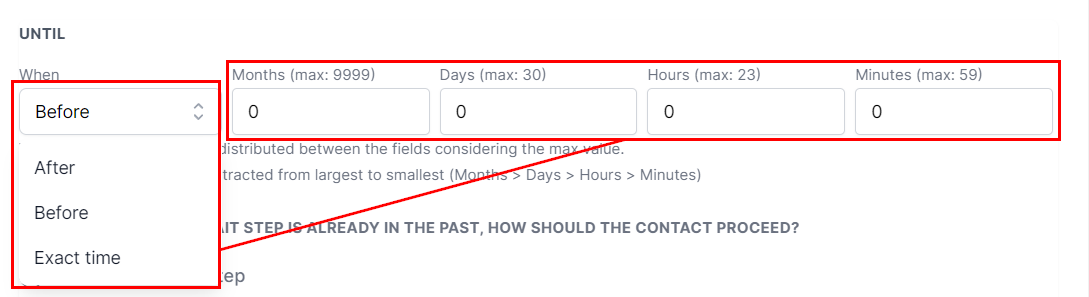
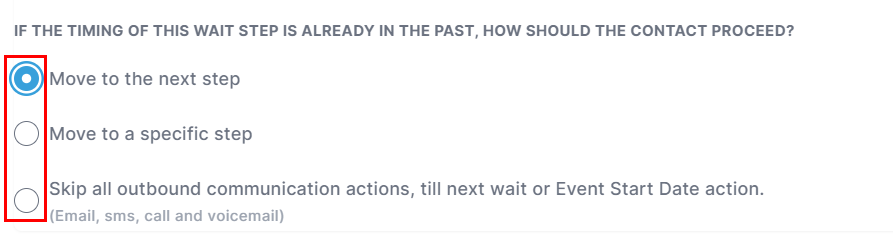
Once set, pick an option for what the Workflow should do if the contact enters the automation after that time has passed.
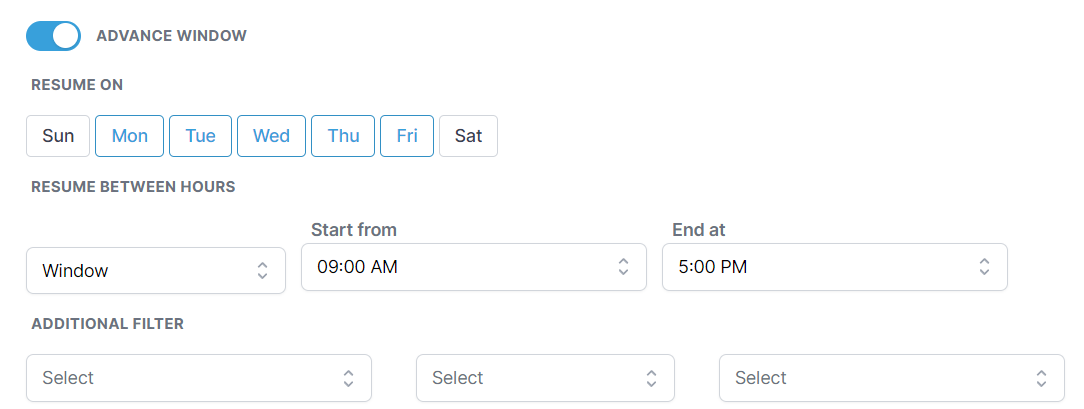
Advance Window
If you'd like to limit the days or hours in which the contact will advance enable Advance Window.
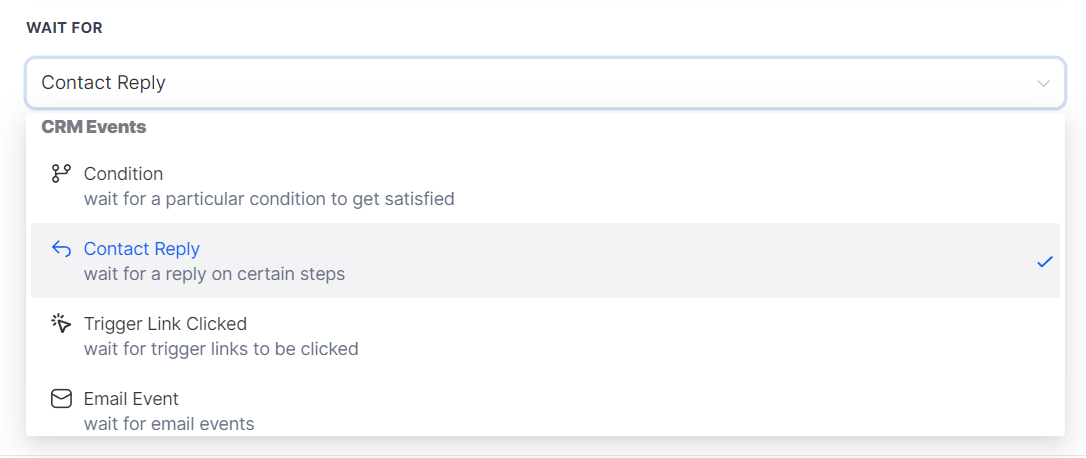
CRM Events
These options are designed for scenarios where user or contact actions are required to progress through the automation. The available options include:
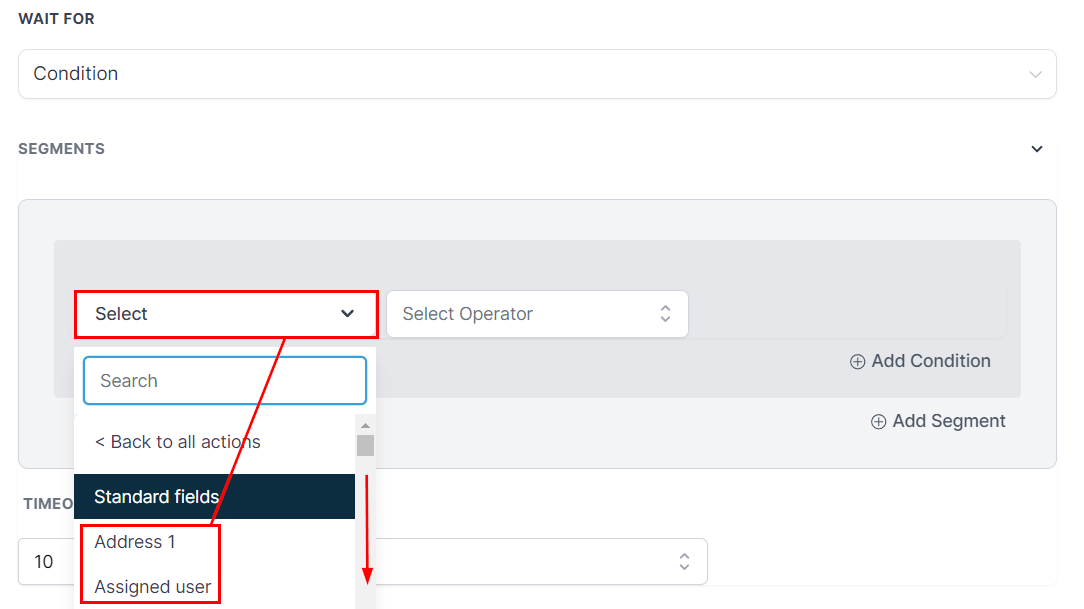
Condition
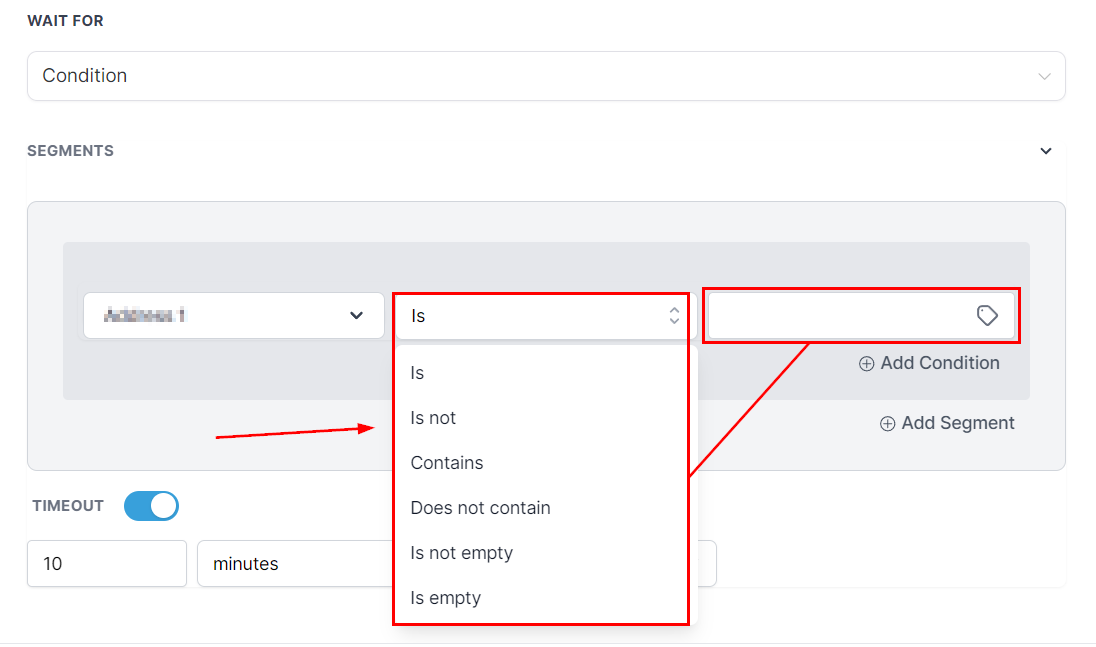
This feature allows you to pause the automation until the contact completes or updates a specific field of information. To configure this, select the contact detail you wish to monitor.
Select the operator then add the response you want.
Contact Reply
This option will keep the contact in the wait step until they respond to a previously sent message. To use it select the step you want the contact to have replied to.

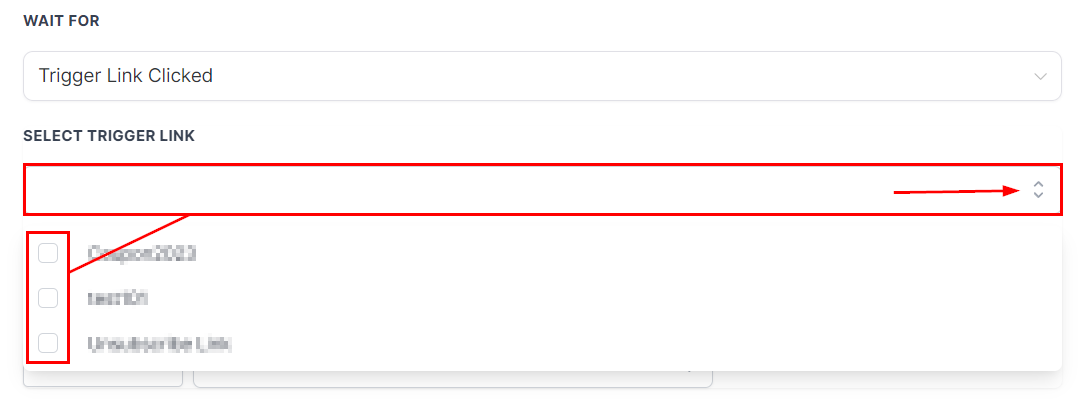
Trigger Link Clicked
This option will keep the contact in the wait step until they click the selected Trigger Link.
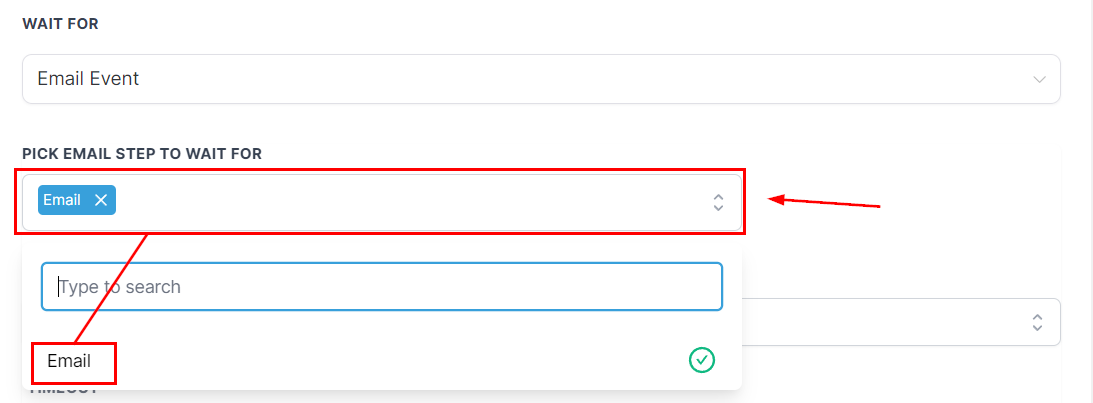
Email Event
This option will keep the contact in the wait step until a contact interacts a certain way with a previously sent email. To use it first select the Email Step you want the contact to interact with.
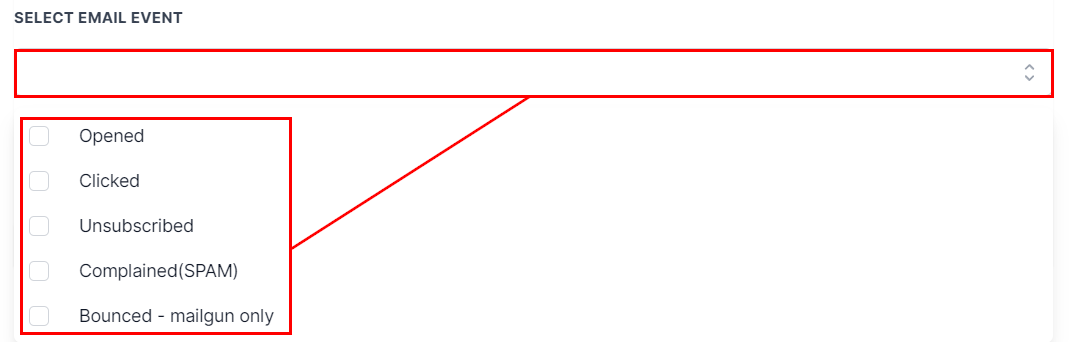
Then select the action you want the contact to have performed for the email.
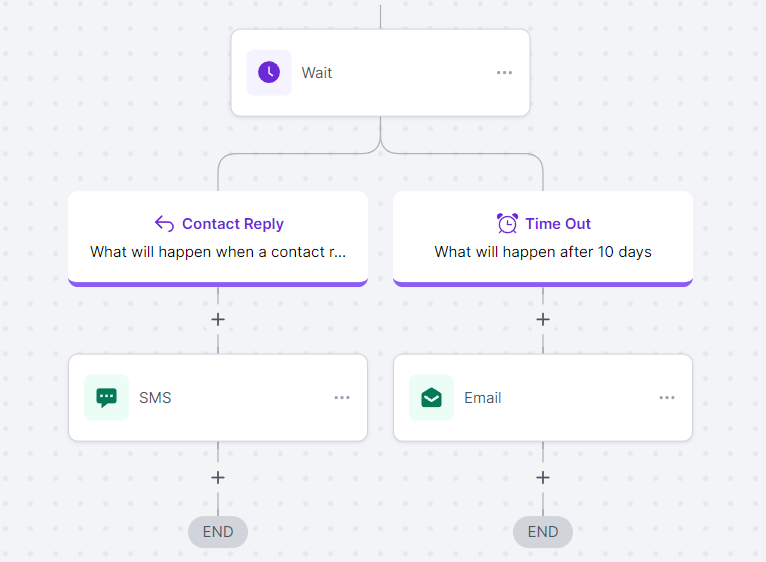
Timeout
If the condition needs to be met in a specific schedule you can set a timeout by toggling the option and setting the timeframe.
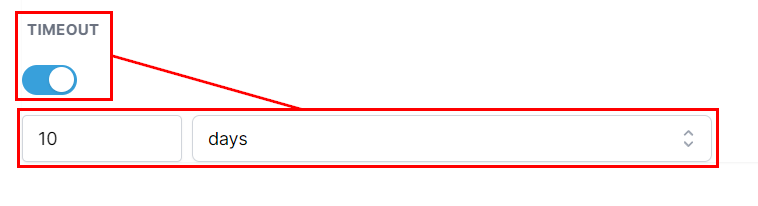
Doing so will result in two branches, one for cases when the condition is met and one for when the timeframe expires.
Saving The Wait Action
Once you've set the conditions for your Wait action you can click Save action and you're done.

Now you can set up Wait steps whenever needed, ensuring that the contact goes through the workflow actions in a precise and convenient time, maximizing the effectiveness of your communications and streamlining your process.