How To Edit An Appointment
Editing an appointment is a crucial feature that allows you to manage your schedule with flexibility and ease. Whether you need to adjust the date or time, status, or modify other aspects of an appointment, having the ability to make changes ensures that your scheduling remains accurate and up-to-date. In this guide, we will walk you through the steps to efficiently edit an appointment, ensuring your calendar stays organized and aligned with your needs.
Appointments can be modified either from the Contact card or through the Appointments section. Let us explore both options, starting with the Contact card.
To begin, go to the Smart List section under the Contact category. Select the contact name for which you wish to edit the appointment booking.

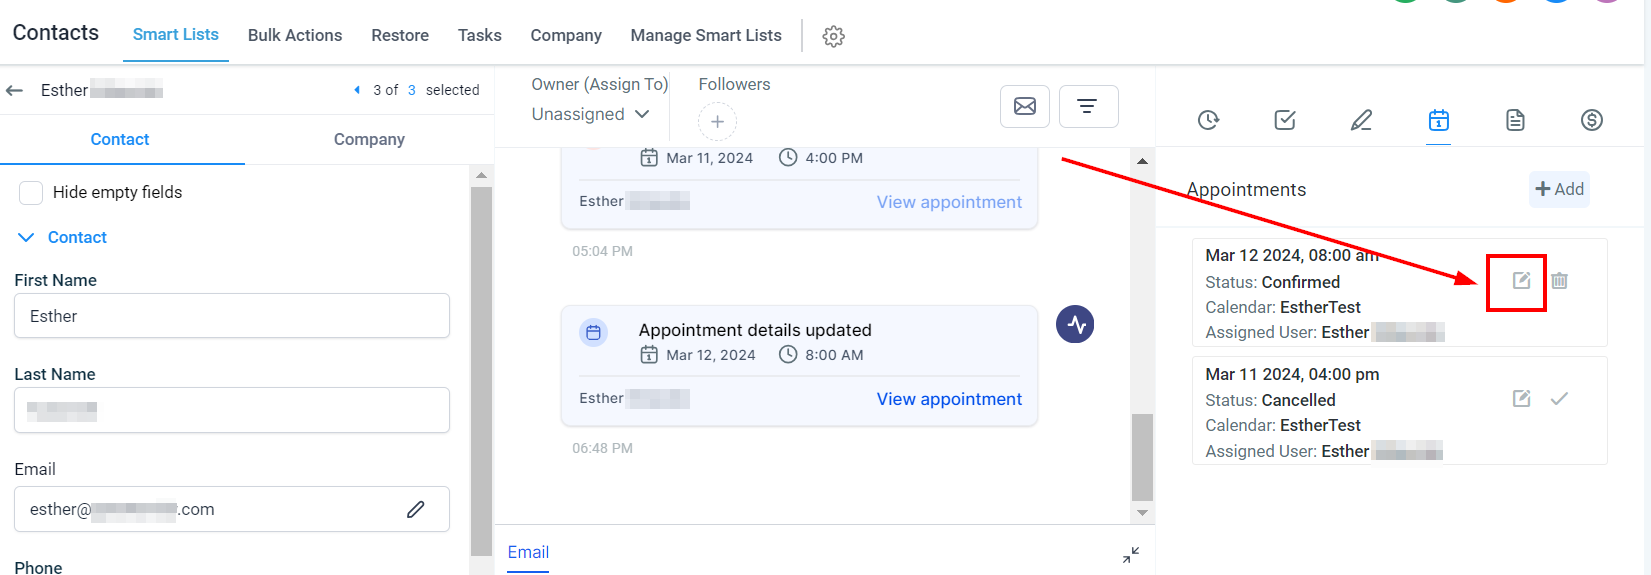
After selecting the contact's name, you will be directed to the Contact Details page. Navigate to the Appointments tab and click the Edit icon.

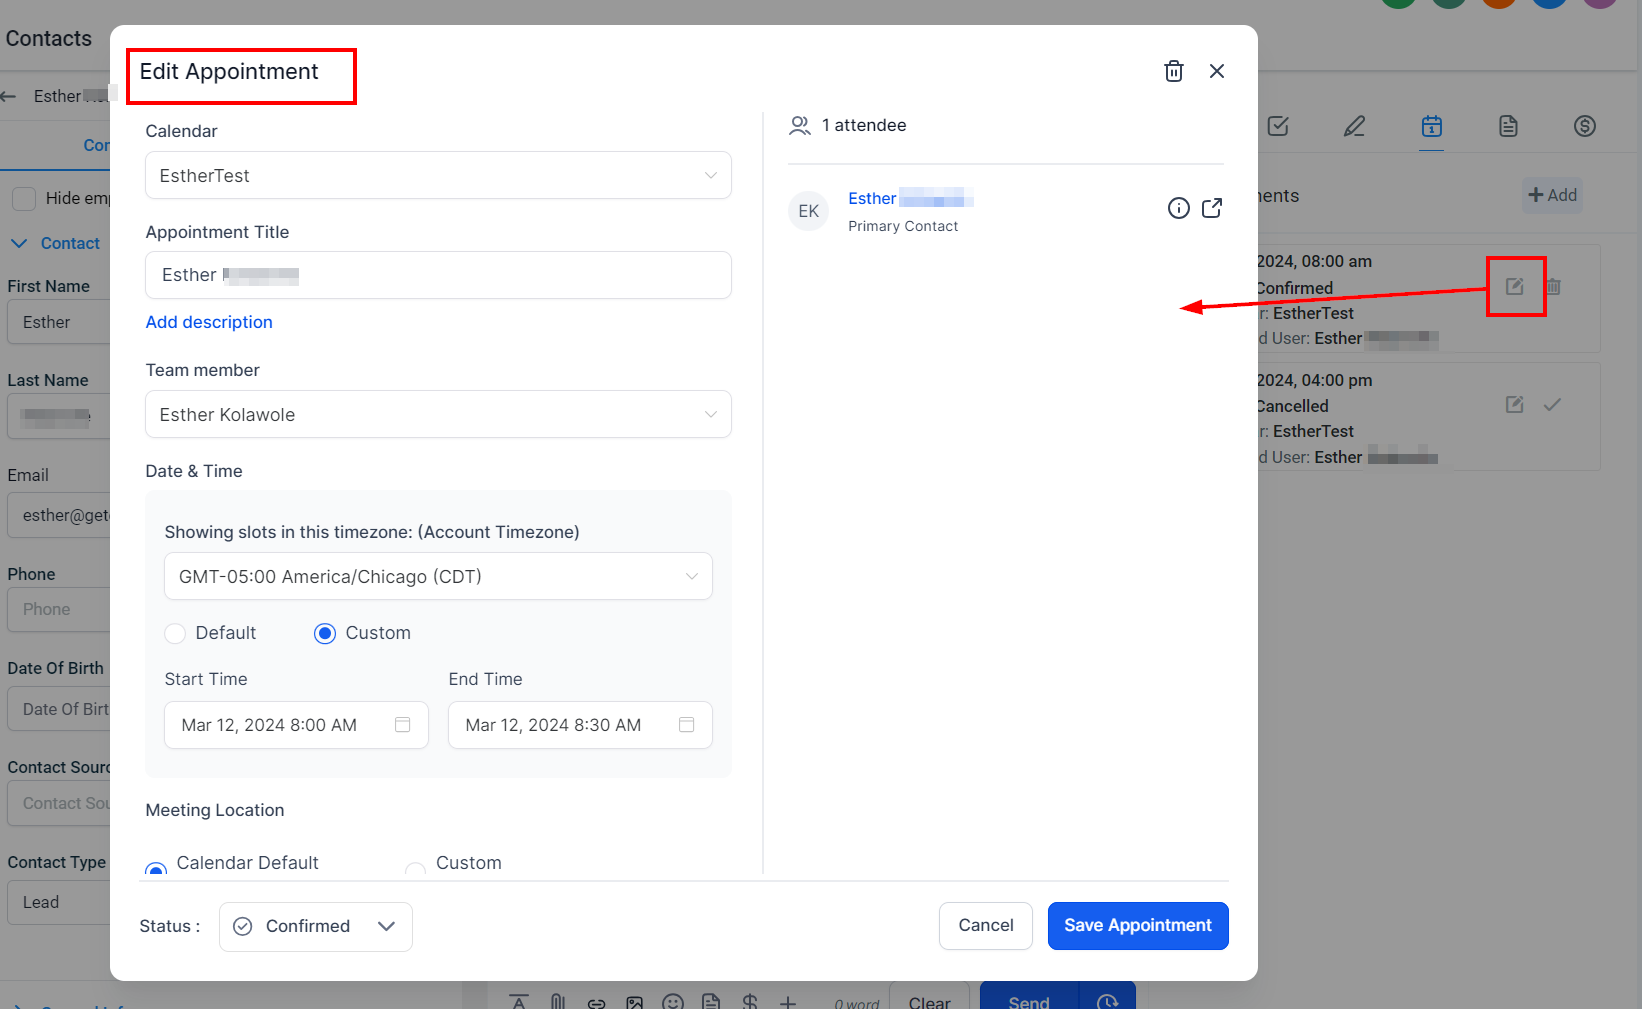
This will open a modal where you can make the necessary adjustments to the appointment. After making the changes, simply click the Save Appointment button to confirm your adjustments.

Alternatively, navigate to the Appointments tab inside the Calendars section.

Click the three-dot icon next to the Appointment and select the Edit option from the actions dropdown.

The appointment editor will reopen, allowing you to make the necessary adjustments. Once you have made the required changes, click the Save Appointment button to confirm and finalize your updates.

By following the outlined steps, through the Contact card or the Appointments section, you can ensure that your appointments reflect the most current information. Mastering these editing techniques will help you manage your calendar efficiently, keeping your appointments well-coordinated and up-to-date.