Form

Adding a form to your webpage doesn’t have to be complicated—it’s a practical way to boost your site’s functionality and improve user experience. Whether you are collecting leads, gathering feedback, or processing orders, a well-designed form can make all the difference. With just a few simple steps, you can easily integrate a form into your page, customize its look and feel, and ensure it works perfectly for your audience.
To start, locate the form element and drag it to the preferred position within your editor's workspace. Next, select the form to be added, or create a new form.

After positioning the form, customize its design and functionality to suit your specific needs, ensuring a seamless user experience and cohesive integration with the rest of your website content.
General Settings
Element Name
The editing toolbar for the selected element appears on the right side of the editor, and you can rename the default name displayed at the top of the screen for ease of navigation as you create your funnel page.

Spacing Option
To adjust the position of your content, you can use the available spacing options, which only apply to the specific part of the page you are editing. Modify the content's top or bottom margins and position using the toggle bars for Padding Left, Right, Top, and Bottom, as well as Margin Top and Bottom.
- Padding Left, Right, Top, and Bottom: These four (4) different toggle bars move the content to either the left, right, top, or bottom depending on the toggle bar you click on.
- Margin Top and Bottom: You can adjust the top or bottom margin of your content by toggling its bars.

Form
If you need to replace the form you have selected at any time, you can do so in the Form section by selecting an option from the drop-down menu.

Edit
Access the form editor by clicking the “Edit Form” button. This will open the selected form in a new tab allowing you to make any necessary adjustments. Once you have saved your changes, the funnel preview will display the updated form and upon refreshing, changes made will also be visible in the builder.

Button Action
- Redirect Action: The Button actions section provides options for what should happen when the customer clicks the submit button on the form. Here you can choose to open a URL, go to the next step in a funnel, or use the form submit options.

Advanced Settings
Visibility
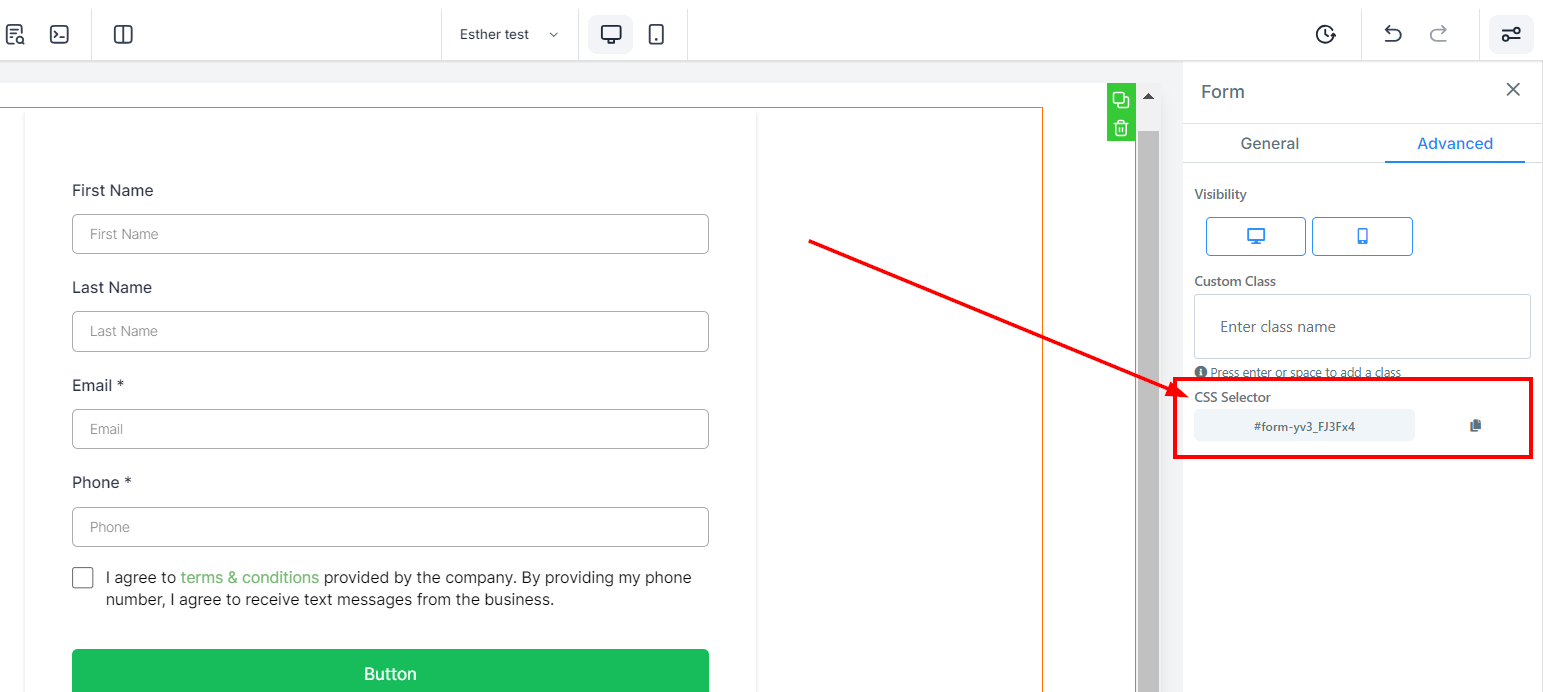
You can decide if you want this particular Edit option to be visible on only mobile devices, desktops, or both by clicking on it to highlight the icon.

Custom Class
You can add a Custom Class by typing a desired class name in the Custom Class field.

CSS Selector
You can copy the CSS Selector reference number by clicking the copy icon located on the right side of the number you want to copy, saving you time and hassle.

And there you have it—adding and customizing a form on your webpage is easier than you might think! By following these steps, you can create a form that not only looks great but also functions flawlessly, ensuring your visitors have a smooth and engaging experience.